

Center of Excellence Starter Kit (CoE) Setup Wizard

In our blog we regularly inform you about experiences we’ve made using the Microsoft Power Platform. In doing so, we especially focus on topics around governance and administration.
Therefore we don’t want to miss to report about our experiences made with the Center of Excellence Starter Kit. Last week the Power CAT team has released their December release including a “Setup Wizard”. This sounded very promising to me. I couldn’t wait to try it out.
What is the Power Platform Center of Excellence Starter Kit
“A Center of Excellence (CoE) in an organization drives innovation and improvement and brings together like-minded people with similar business goals to share knowledge and success, while at the same time providing standards, consistency, and governance to the organization.
The Microsoft Power Platform CoE Starter Kit is a collection of components and tools that are designed to help you get started with developing a strategy for adopting and supporting Microsoft Power Platform, with a focus on Power Apps, Power Automate, and Power Virtual Agents.”
This description is from https://learn.microsoft.com/en-us/power-platform/guidance/coe/starter-kit
Setup and Installation
Everyone who’s ever installed or updated the CoE knows how time-consuming it can be. Not just the setup procedure, but also the learning process, the evaluation and finally the configuration and adoption of new features. It’s definitely challenging to keep up with all this. Especially since new features are delivered almost every month.
Remarks: It’s not recommended just installing and activating all the features without prior evaluation and testing. Keep in mind that there are plenty of workflows that potentially send lots of e-mails to users in your company or even delete components your “makers” have developed. Furthermore, I wouldn’t recommend installing every update to production immediately after released. Better give it some time, so that possible bugs can get identified and fixed.
Challenge to find the technical differences between releases
In the past, I always tried hard to find the detailed differences between the latest releases. I wanted to know their content, because I didn’t want to get surprised by unexpected things and keep risks as low as possible. The release notes provide good indications of changes, but they usually don’t give you the exact information of which components are new and which ones are modified. You’ll already guess that the new “Setup Wizard” addresses many of those points.
So, let’s now have a look at the features the “Setup Wizard” provides. As usual for solutions provided by the Power CAT team, everything is packed into Power Platform Solutions. Even the “Setup Wizard”. This of course is kind of a dilemma, since we need to install the Core Solution before we can start the “Setup Wizard”. Luckily, this first installation step is kept to a minimal manual configuration. You can find the instructions here.
Note: The “Setup Wizard” from the December release is still in preview and therefore not complete and probably also not free from bugs.
Once the Core Components are installed, you’ll find a new Model Driven App “CoE Starter Kit Setup Wizard”. The usage is as easy as expected. When you first start the Wizard, a guided dialog sequence pops-up, showing you some information of the setup or latest upgrade.
Solution History
In the first dialog, you’re presented a summary of the latest solution update history. I think, this is exactly the same history you find on every solution, when you right-click and open the “See history” menu. This is useful, because you probably wouldn’t continue with any further setup steps before the installation had completely finished or if it had failed.

Upgrade History
Unmanaged Solution Layers
In the next step you are presented a list of all components containing unmanaged solution layers. This is for sure another time saver.

Information about unmanaged layers
What’s an unmanaged solution layer?
An unmanaged solution layer is created each time, when a component from a managed solution is edited. Be aware that this sometimes also happen without knowing.
You can find a documentation of the concepts of solution layers here: https://learn.microsoft.com/en-us/power-apps/maker/data-platform/solution-layers
Finding them with the standard product features can be very cumbersome, because you would need to check every component individually.
I recommend using the “Solution Layers Explorer” plug-in from the XRM-Toolbox (https://www.xrmtoolbox.com) in order to easily identify and eliminate unmanaged solution layers.
Run Inventory Flows
This wizard step ensures that the inventory flows run at least once before you continue with the setup process. Otherwise you wouldn’t see any data in your CoE Apps.
What are the inventory flows?
The inventory flows are a set of flows that are repeatedly gathering a lot of information about your Power Platform tenant. This includes all Canvas Apps, Model Driven Apps, Power Pages, Cloud Flows, Desktop Flows, Power Virtual Agent Bots, Connectors, Solutions and even more.

New and updated components
This step in the wizard was positively surprising me. In this dialog, you can see which components had been added during the upgrade. Another great time saver, because like this I exactly know where to focus on during testing.

The Setup Wizard
Once acknowledged last dialog the first step from the main wizard shows up. This wizard uses a so called “Subway Navigation” (on the left side), that shows the current position of the setup process.
Tip: This nice “Subway navigation” is part of the November release from the Creator Kit (a Collection of Custom Controls based on the Fluent UI, also provided by the Microsoft Power CAT team).
Remark: Since the December release of the CoE the Creator Kit needs to be installed on your CoE environment before you can install the CoE Core Component.
Pre-Requisites
Next you are presented some of the pre-requisites for running the tools of the CoE.

Communication Methods
In Step 2 you get help setting some of environment variables. More precisely creating and setting the Azure Active Directory groups (e-mail enabled) needed for the three main personas used by the core solution. If this is the first time installation, you can even create those groups directly out of this wizard. These groups can be used to share the app, receive e-mails or collaborate in teams workspaces.
Note: Permissions on Dataverse resources can’t be granted directly by active directory groups. Data security in the CoE is primraly controlled by the tree security roles “Power Platform Admin SR”, “Power Platform Maker SR”, “Power Platform User SR”. I recommend to create three AAD Office Group Teams in Dataverse representing the three M365 Groups from above and adding them to the corresponding security roles in Dataverse. This will assure a consistent and comprehensible security model.

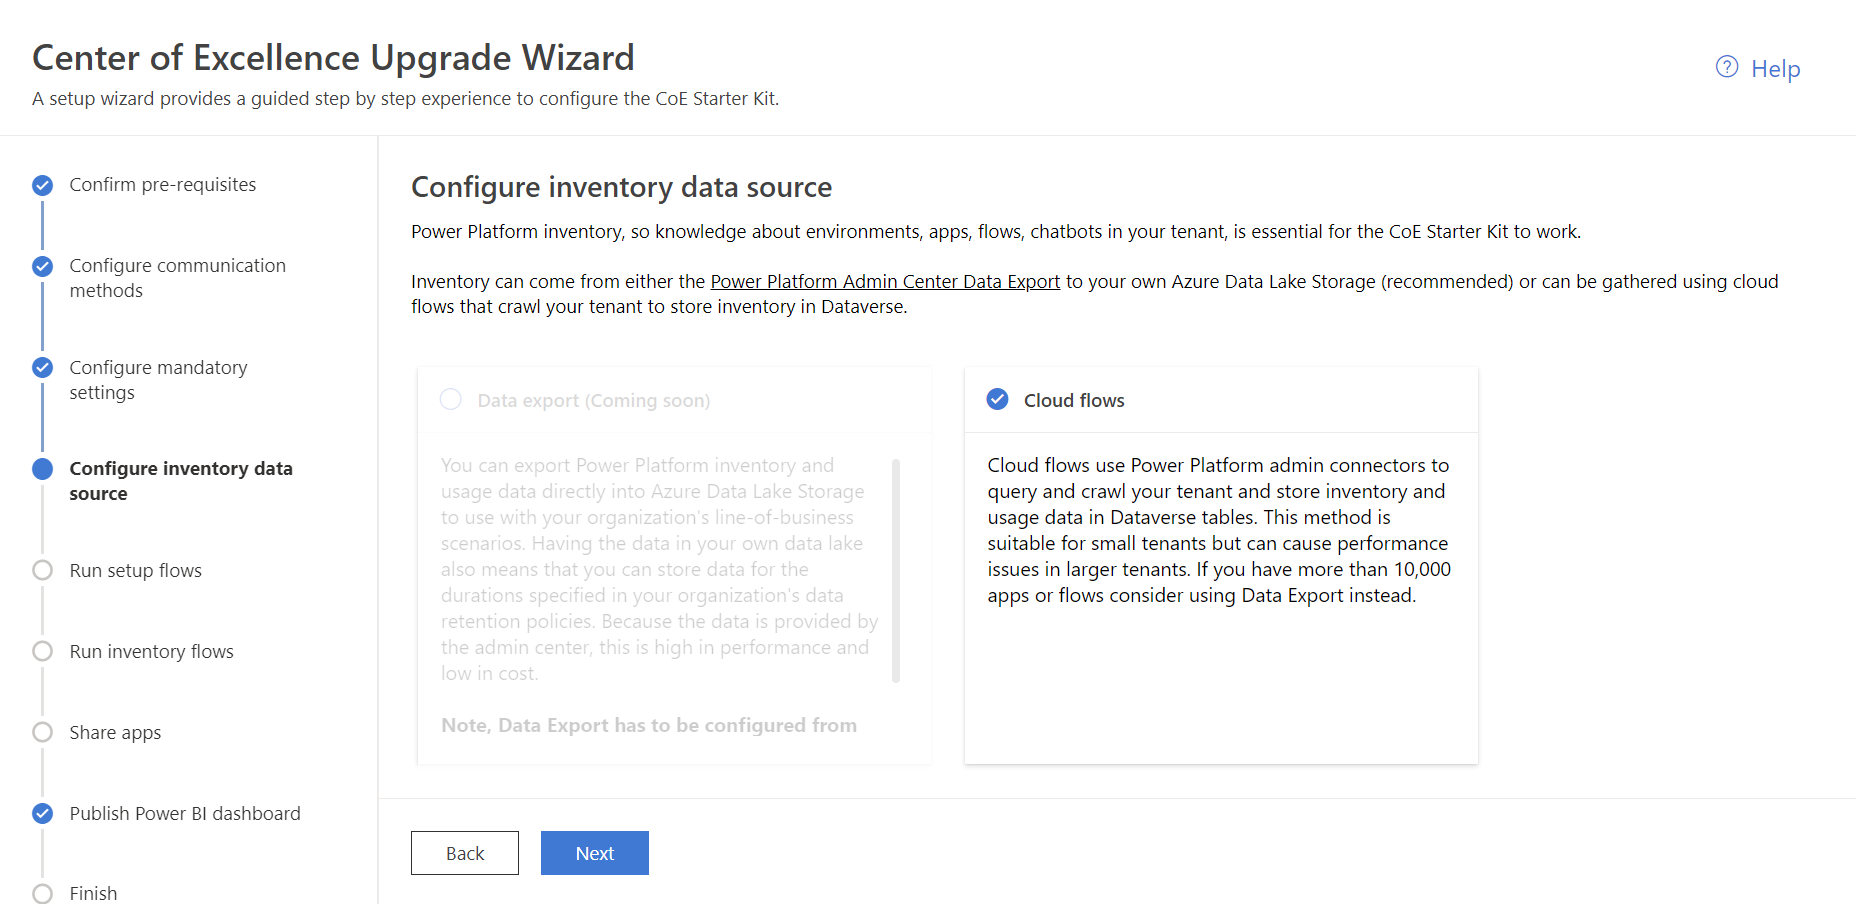
Configure Inventory Data Source
This step allows you to choose the inventory data source. This is another new feature from the CoE which was recently announced. As an alternative to gathering all the inventory data by using cloud flows and store it to Dataverse, it can soon also be exported and stored in an Azure Data Lake storage by the Self-Service-Analytics (https://learn.microsoft.com/en-us/power-platform/admin/self-service-analytics). This is clearly a very important architectural change, because using cloud flows to collect all inventory data in larger tenants is not the best option for various reasons. Cloud flows are certainly not the most performant way to collect large amount of data and also not the cheapest one.
Tip: Always be aware of your request limits when using Cloud Flows (https://learn.microsoft.com/en-us/power-platform/admin/api-request-limits-allocations#licensed-user-request-limits). You can review consumption in a slightly hidden report in the Admin Center (https://admin.powerplatform.microsoft.com/resources/downloadreports).
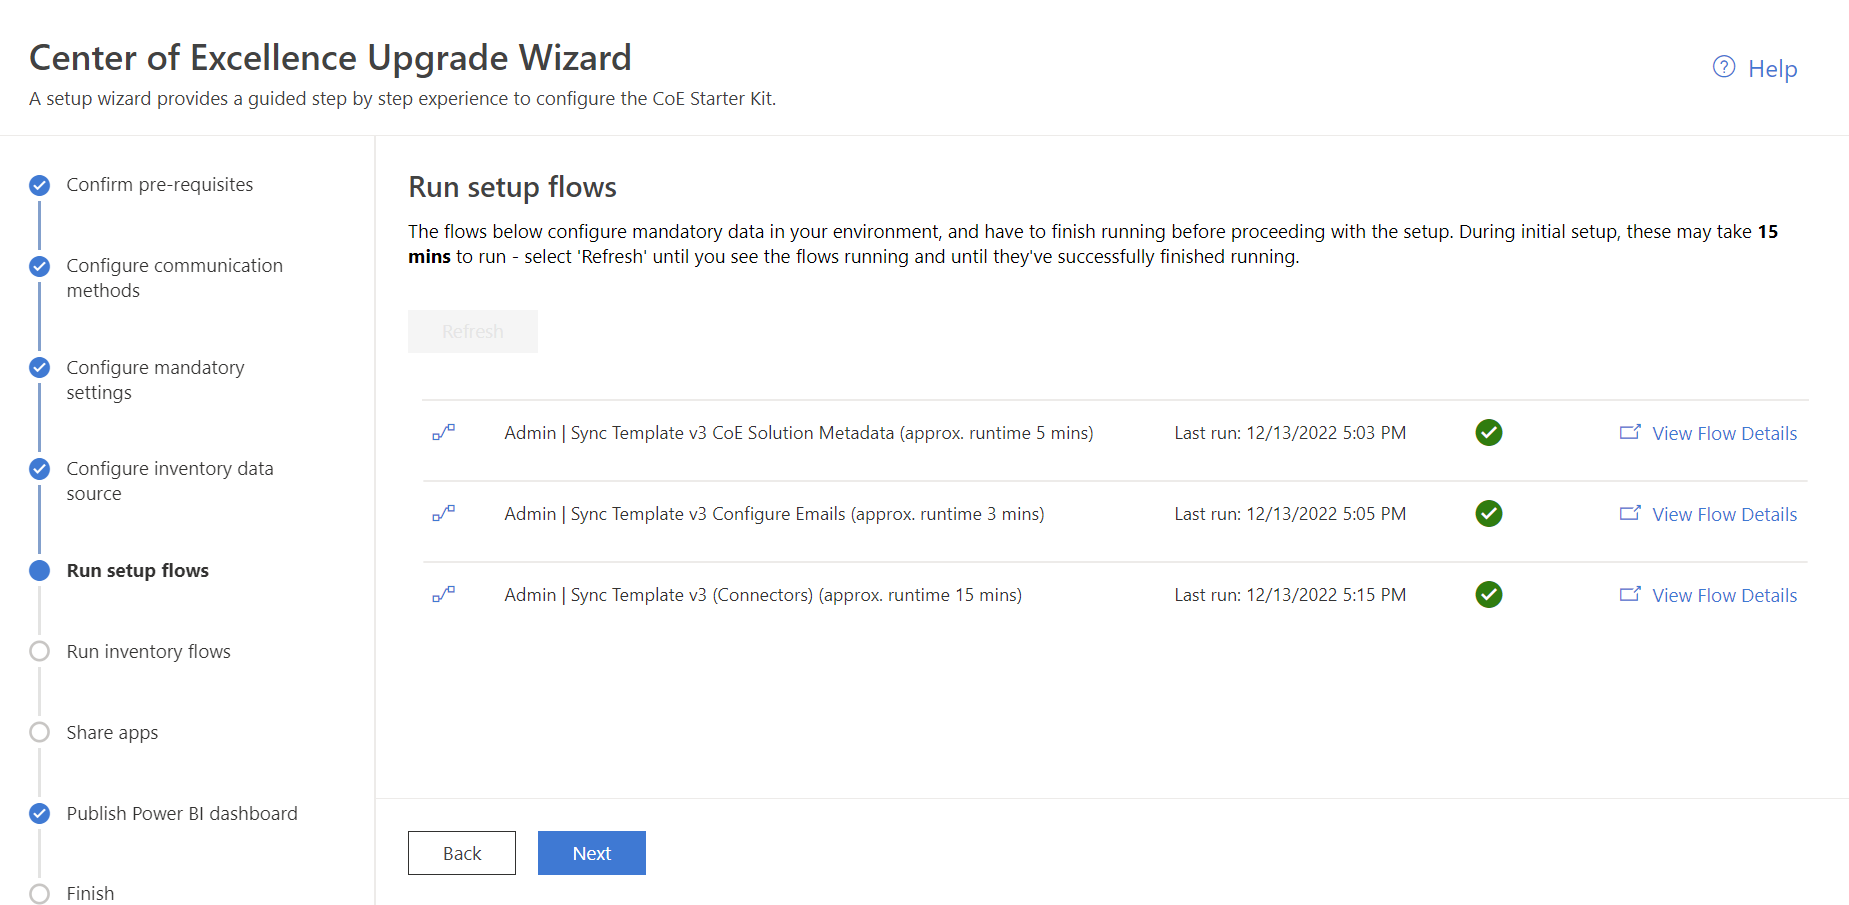
Run Setup Flow
This step helps to execute the setup Flows which usually only need to be run once when you set up a new CoE environment.
Share Apps
In this step you can choose which canvas apps from the CoE you would like to share with whom.
Remarks: The sharing experience in Microsoft products unfortunately is quite confusing. Especially in the context of the Power Platform where many different technologies meet together. For example you can’t share a canvas app with a Power Platform security group whereas you have to share the underlying data with a security group, if it resides in Dataverse. On the other hand, a model driven app is always shared by security groups. I’ll probably blog about the sharing features of the Power Platform in the future soon. Hopefully I’ll bring some light into that darkness.

Publish Power Bi Dashboard
This part of the wizard currently consists of a collection of links to resources, helping to configure and use the Power Bi Dashobards included in the CoE.

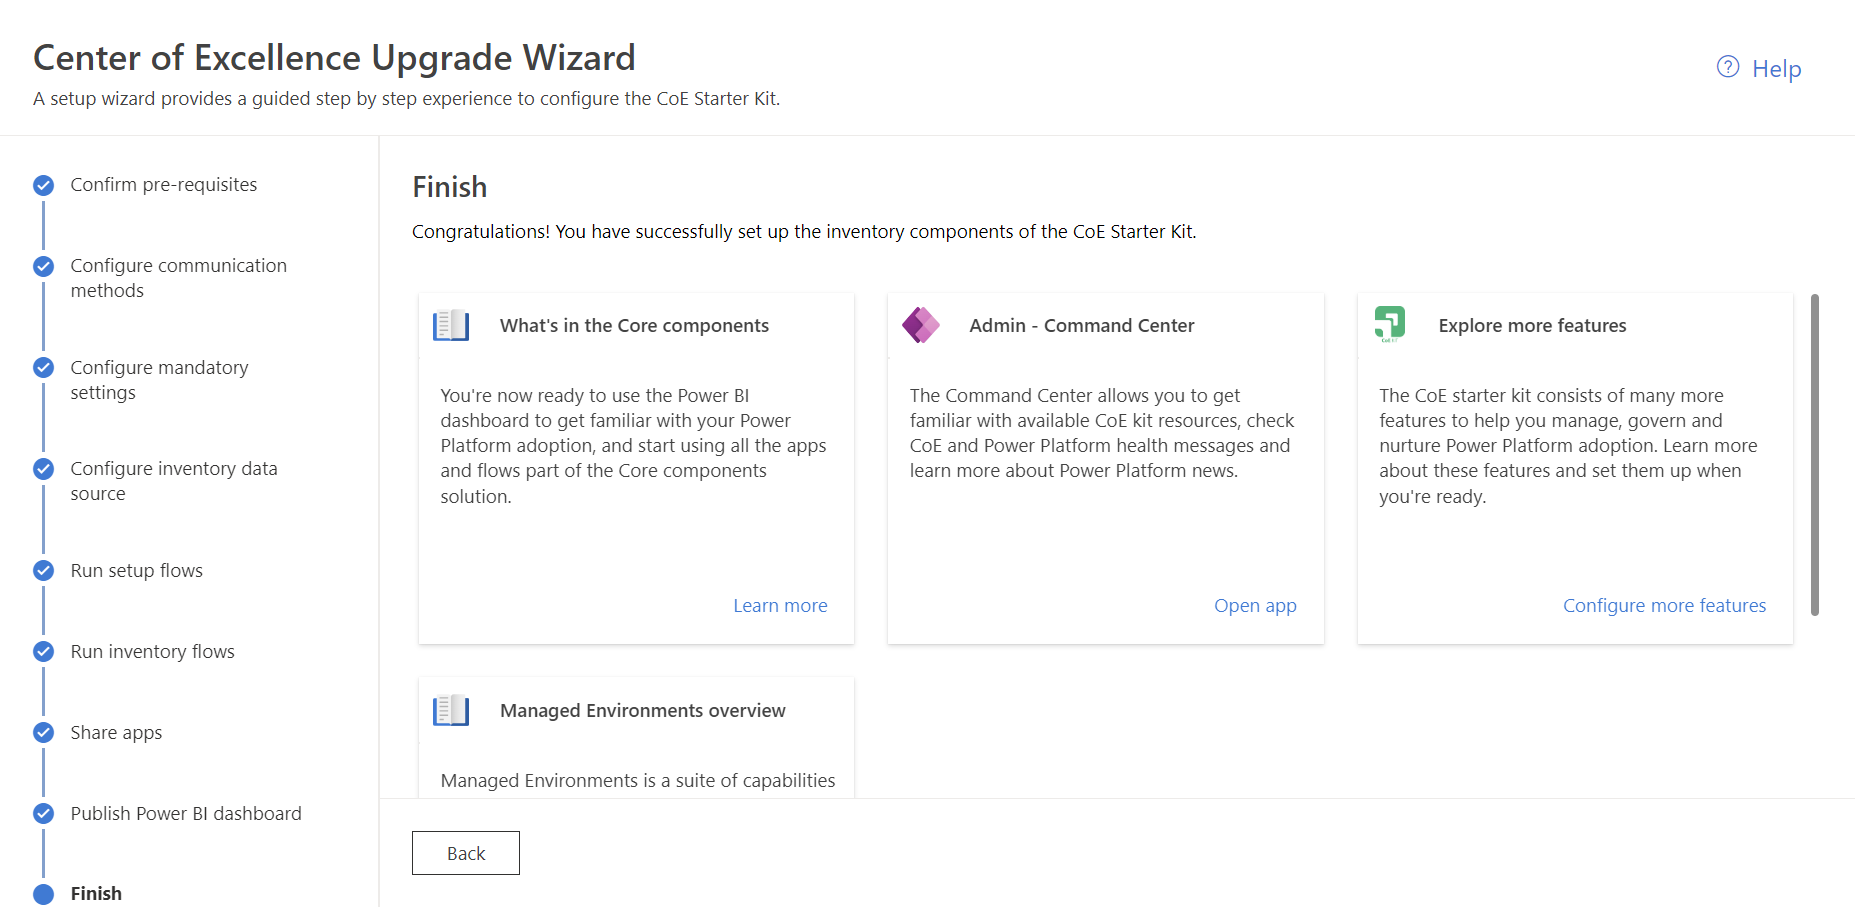
Finish
Similar to the step before, you’ll find some additional helpful resources to complete the inital setup process.
And no, this is not the end 😊. You’ve now just reached the end of the baseline setup process. Meaning, it is the starting point from where you can dive into the configuration of all the other features you may want to use in your organization.
Explore more features
The “more features” menu is a very inconspicuous navigation point inside of the app. But there’s quite a lot behind of it.
First of all, you get a nice overview of the CoE features. If you click on “Configure this feature” an additional wizard will show up that will guide you through the setup process.
Apart from the guided setup help, it’s already very useful to figure out which flows belong to which process or app. I used to document this by myself in the past. I definitely won’t miss that 😊.

Most of those “Feature Wizards” (more features…) have a similar structure, depending on the feature architecture.
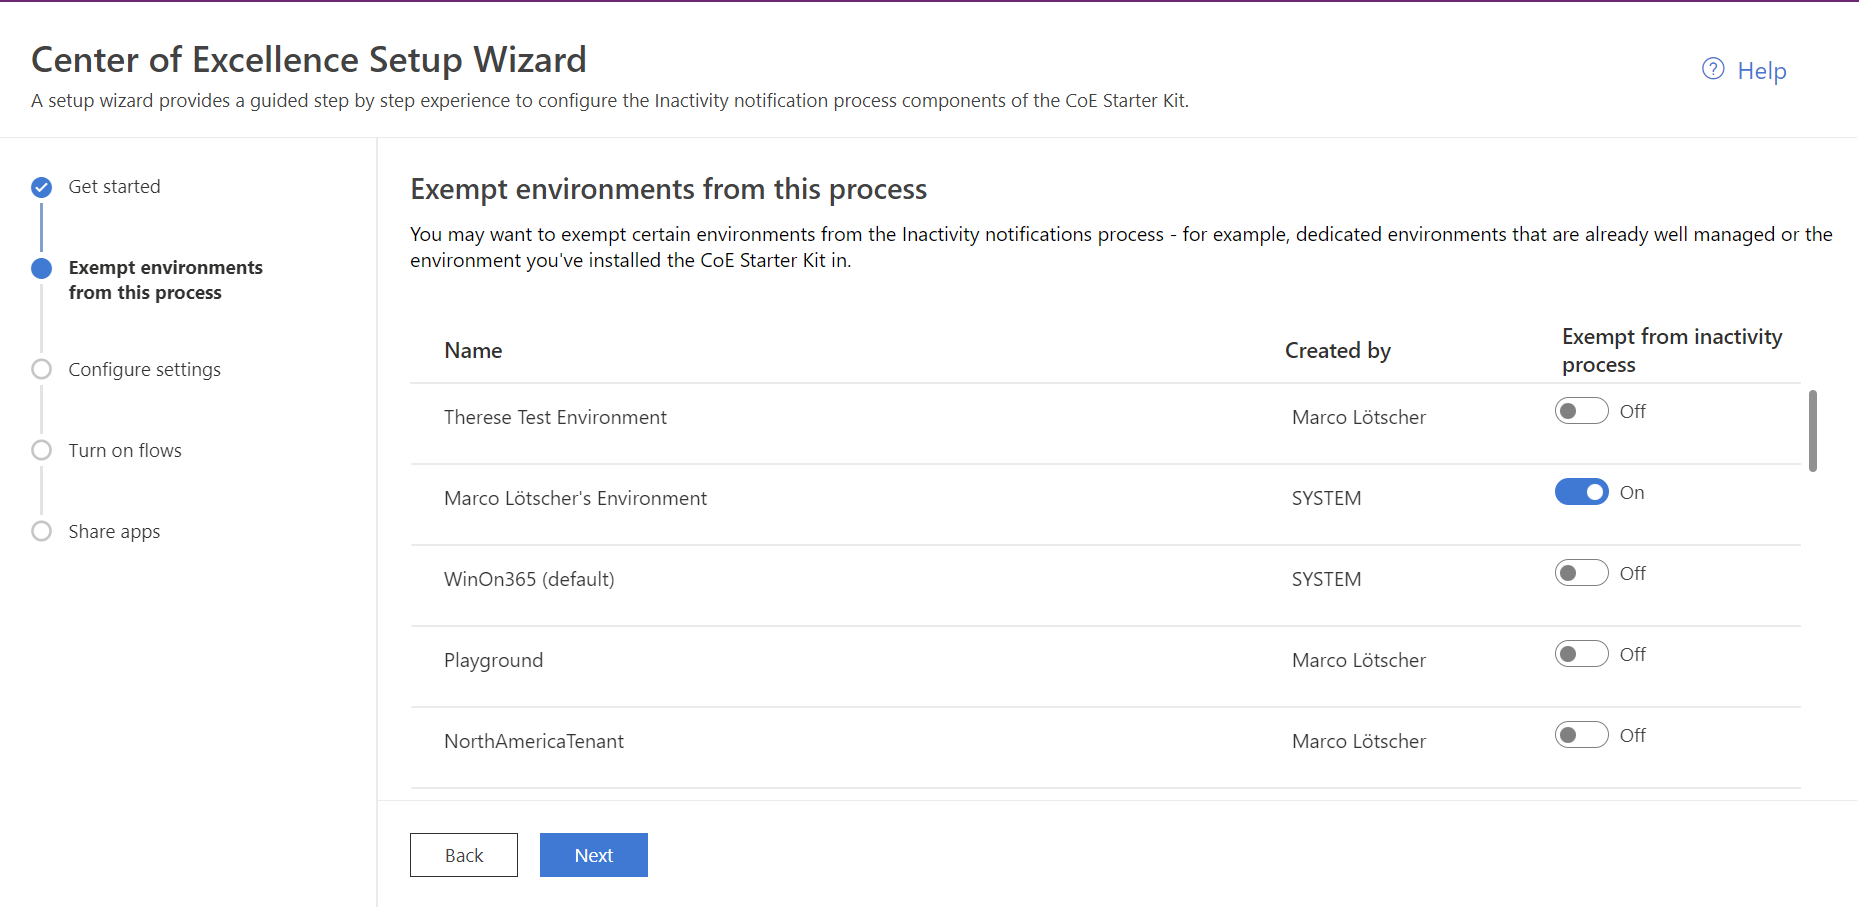
In the following I’m going to show just one example from the “Governance Components”, the “Inactivity Notification Process”:
Step 1 “Get started”

Step 2 “Exempt environments”
Step 3 “Configure Environment Variables”

Step 4 “Turn on the flows”

Step 5 “Share apps”

Conclusion
I must admit, that I had not expected that this wizard would go that far in the first preview release. It’s impressively mature already. In my opinion, this new wizard isn’t just a tool for installing and upgrading the CoE. It’s also a clear and handy resource to get an overview of the CoE architecture and a great starting point for finding any documentation. Thanks to this wizard, you can now clearly identify which components from the solutions are used for what features. This simplifies administration, operations, maintenance and may be even customizations.
I hope the Power CAT team will continue investing in that wizard, so that it will soon cover all feature included in the CoE Starter Kit. Thanks to this wizard we all can spend more time in other very important tasks around Power Platform Governance, like evaluating and adopting the features, instead of doing research of how to install and configure the CoE.
And lasty I think thanks to this wizard the Power CAT team will be very happy to be relieved from lots of support requests.